Table of Contents
For Mac users navigating today’s hyper-connected world, the humble webcam has evolved from a simple accessory into a critical tool for professional presence and personal connection. Whether you’re closing deals in high-stakes video conferences, collaborating with global teams, teaching virtual classrooms, or simply staying close with loved ones across time zones, the quality of your video feed directly impacts how you’re perceived and how effectively you communicate. Yet, even with Apple’s renowned ecosystem, finding a webcam that truly integrates seamlessly—without frustrating driver conflicts, inconsistent performance, or pixelated visuals—remains a surprisingly common headache. The promise of “plug-and-play” often meets the reality of compatibility quirks, especially as macOS updates roll out or new Apple Silicon models hit the market.
This isn’t just about avoiding blurry video. It’s about the subtle confidence that comes from knowing your audio is crisp, your lighting flatters, your camera wakes up instantly when Zoom calls you, and your privacy shutter clicks shut with satisfying certainty. Mac users deserve technology that works with them, not against them, turning the chore of constant video interaction into a smooth, professional, and even enjoyable experience. Forget wrestling with settings mid-meeting; the right webcam integration should feel like an invisible extension of your Mac, amplifying your presence without demanding your attention. Let’s cut through the noise and focus on what actually matters for effortless, high-quality video on your Apple machine.
Top 10 Webcams for Mac
Detailed Product Reviews
1. Logitech Brio 101 Full HD 1080p Webcam for Meetings, Streaming, Desktop, Laptop, PC - Built-in Mic, Shutter, Works with Zoom, Microsoft Teams, Nintendo Switch 2’s New GameChat Mode, USB-A,-Black

Overview: The Logitech Brio 101 is a streamlined, business-focused webcam designed for reliable video conferencing and streaming on Windows, macOS, and emerging platforms like the Nintendo Switch 2’s GameChat mode.
What Makes It Stand Out: Its standout feature is RightLight auto-light balancing, boosting brightness by 50% to eliminate shadows in dim environments—superior to older Logitech models. The physical privacy shutter and plug-and-play compatibility with major platforms (Zoom, Teams) ensure security and effortless setup.
Value for Money: Priced mid-to-high, it justifies cost through consistent Logitech quality, robust build, and Switch 2 readiness. While cheaper alternatives exist, they often lack the refined light correction and trusted ecosystem integration.
Strengths and Weaknesses: Strengths: Exceptional low-light performance, physical shutter for privacy, crisp 1080p clarity, and broad software compatibility. Weaknesses: Only one USB-A port (no USB-C), and the mic, while clear, struggles in very noisy rooms.
Bottom Line: Ideal for professionals prioritizing reliability and lighting adaptability; a top pick for hybrid workers despite minor audio limitations.
2. Shcngqio 1080P HD Webcam with Microphone, Noise Cancellation, Privacy Cover, Wide-Angle Lens, Auto Light Correction, Plug & Play USB Webcam for Laptop, Desktop, PC, Mac, Zoom, Skype, Streaming (Black)

Overview: The Shcngqio TWC29 is a budget-friendly 1080p webcam targeting home users and content creators, emphasizing privacy and adaptability across diverse lighting conditions.
What Makes It Stand Out: It combines a sliding privacy cover, wide-angle lens (capturing more participants), and advanced auto-light correction that dynamically adjusts to extreme lighting—from pitch black to harsh glare—without manual tweaks. The noise-canceling mic excels in busy households.
Value for Money: Exceptional for its price, offering features (privacy cover, wide FOV) often missing in sub-$40 webcams. It outperforms no-name brands in consistency but lacks the polish of premium Logitech models.
Strengths and Weaknesses: Strengths: Comprehensive privacy solution, reliable noise cancellation, versatile lighting adaptation, and true plug-and-play simplicity. Weaknesses: Plastic build feels less durable, and video can soften at frame edges due to the wide lens.
Bottom Line: A stellar budget choice for students or remote workers needing privacy and solid performance without breaking the bank.
3. Logitech C920x HD Pro PC Webcam, Full HD 1080p/30fps Video, Clear Audio, HD Light Correction, Works with Microsoft Teams, Google Meet, Zoom, Nintendo Switch 2’s New GameChat Mode, Mac/Tablet- Black

Overview: Logitech’s C920x is a refreshed iteration of their iconic pro webcam, engineered for crisp video calls and streaming on PCs, Macs, and the Nintendo Switch 2’s GameChat feature.
What Makes It Stand Out: Dual microphones deliver rich stereo audio—a rarity in this class—while HD light correction and autofocus render vibrant, sharp 1080p video even in challenging lighting. Its universal clip fits monitors, tripods, and laptops seamlessly.
Value for Money: Competitively priced against newer rivals, it offers unmatched audio quality and Logitech’s proven reliability. Cheaper webcams compromise on mic quality or low-light handling, making this a long-term investment.
Strengths and Weaknesses: Strengths: Outstanding dual-mic clarity, excellent autofocus, robust compatibility, and consistent color accuracy. Weaknesses: No physical privacy shutter, and the USB cable lacks strain relief, risking fraying over time.
Bottom Line: The go-to for creators and professionals needing premium audio and dependable 1080p video; skip only if a privacy shutter is non-negotiable.
4. EMEET 1080P Webcam with Microphone, C960 Web Cam, 2 Mics, 90° FOV, USB Type-A & A-to-C Adapter, Plug&Play Computer Camera for Online Calling, Zoom/Teams/Facetime, Switch 2 Camera Support, 2025 Version

Overview: EMEET’s C960 2025 Version is a versatile hybrid webcam targeting mobile professionals, featuring dual mics, flexible connectivity, and Nintendo Switch 2 support for video chat.
What Makes It Stand Out: Unique dual omnidirectional mics create a “radio effect” for broadcast-quality audio, while the included USB-A-to-C adapter ensures compatibility with modern laptops. The auto-sliding privacy cover and 90° FOV lens simplify framing multiple people.
Value for Money: Priced mid-range, it delivers exceptional audio and future-proofed USB-C support. Though Switch 2 compatibility is untested, the audio edge justifies the cost over single-mic rivals.
Strengths and Weaknesses: Strengths: Best-in-class mic clarity, USB-C flexibility, wide FOV, and smooth privacy cover. Weaknesses: Incompatible with Windows Hello and tablets; requires manual mic selection in settings.
Bottom Line: Highly recommended for podcasters or frequent meeting hosts who prioritize audio fidelity and portability, despite minor compatibility gaps.
5. 1080P Full HD Webcam with Noise-Canceling Mic, Auto Light Correction, Privacy Cover and Wide Angle Lens, Plug & Play USB Camera for Laptop/Desktop/PC/Mac, Compatible with Zoom/Skype/Teams/Streaming

Overview: The TRAUSI 1080p webcam is an entry-level plug-and-play solution for casual users, emphasizing noise cancellation and privacy across Windows, Mac, and Android TV.
What Makes It Stand Out: It mirrors Shcngqio’s core features—a magnetic privacy cover, 5ft cable, and auto-light correction for consistent visuals—but at a slightly lower price point. The wide-angle lens captures groups effortlessly for online classes or family calls.
Value for Money: The most affordable option here, it’s perfect for budget-conscious buyers. However, it trades off build quality and audio nuance compared to EMEET or Logitech.
Strengths and Weaknesses: Strengths: Low-cost privacy cover, effective noise reduction, reliable plug-and-play setup, and strong low-light adjustment. Weaknesses: Mediocre mic clarity in windy environments; plastic housing feels flimsy.
Bottom Line: A solid basic webcam for students or infrequent users, but upgrade for professional audio demands or heavy daily use.
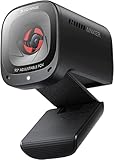
6. EMEET C960 4K Webcam for PC, 4K UHD CMOS Sensor, PDAF Auto Focus, Dual Omnidirectional Mics, Auto Light Correction, 73° FOV, Plug&Play Webcam w/Privacy Cover, Works w/Zoom/Teams/Skype/Google Meet

Overview: The EMEET C960 delivers true 4K UHD video for professional remote meetings, featuring a genuine 4K CMOS sensor, PDAF autofocus, and dual mics. It targets users prioritizing top-tier video/audio clarity without complex setup.
What Makes It Stand Out: Its authentic 4K resolution (requiring manual switch via software) and phase-detection autofocus eliminate blurriness during movement. Auto light correction handles extreme lighting, while dual mics capture clear audio up to 1.5m away. The privacy cover and 360° adjustability add versatility.
Value for Money: Priced mid-to-high, it justifies cost for professionals needing 4K detail (e.g., designers), though most casual users won’t exploit 4K. Outperforms similarly priced 1080p webcams in resolution but requires compatible software to unlock full potential.
Strengths and Weaknesses: Pros: Genuine 4K clarity, excellent low-light performance, robust audio, flexible mounting. Cons: 4K not default (manual setup needed), narrower 73° FOV limits group shots, macOS software may lack Windows features.
Bottom Line: Ideal for professionals demanding 4K precision, but overkill for casual use. Choose if video detail is critical; otherwise, consider 1080p alternatives for better value.
7. Logitech C270 HD Webcam, 720p, Widescreen HD Video Calling, Light Correction, Noise-Reducing Mic, Works with Zoom, Nintendo Switch 2’s New GameChat Mode, PC/Mac/Laptop/MacBook/Tablet - Black
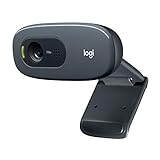
Overview: An entry-level 720p webcam from Logitech, designed for basic video calls on Windows, macOS, and Nintendo Switch 2’s GameChat. It emphasizes simplicity with plug-and-play functionality and RightLight 2 optimization.
What Makes It Stand Out: Nintendo Switch 2 compatibility (though unverified pre-launch) and RightLight 2 tech adjust brightness in poor lighting. The noise-reducing mic captures voice clearly up to 1.5m, while the clip offers flexible mounting on screens or shelves.
Value for Money: Exceptionally affordable, making it perfect for budget-conscious users or as a secondary webcam. However, 720p resolution feels outdated versus modern 1080p standards, and audio/video quality lacks depth for professional use.
Strengths and Weaknesses: Pros: Ultra-budget price, reliable plug-and-play, decent mic for quiet spaces, compact design. Cons: Only 720p resolution, narrow 55° FOV, no privacy cover, Switch 2 claims are speculative.
Bottom Line: A functional starter webcam for infrequent use or casual calls, but avoid for professional settings. Prioritize newer 1080p models if budget allows.
8. Gohero Full HD 1080P Video Webcam, Noise Cancellation, Privacy Cover, Wide-Angle Lens, Auto Light Correction, Plug & Play USB Webcam for Laptop, Desktop, PC, Mac, Zoom, Skype Pro Series
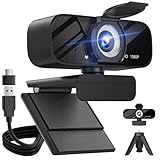
Overview: The Gohero 1080p webcam offers Full HD clarity, noise-canceling audio, and a privacy cover for versatile use in calls, streaming, or teaching. It emphasizes ease of use with true plug-and-play setup.
What Makes It Stand Out: Its 100° wide-angle lens captures more of your space than competitors, while auto light correction adapts seamlessly to dark or bright rooms. The slide privacy cover and 5ft USB cable enhance convenience and security without drivers.
Value for Money: Priced competitively, it outperforms similarly priced webcams with superior field of view and robust low-light handling. Excellent for educators or streamers needing broad framing, though audio quality lags behind premium mics.
Strengths and Weaknesses: Pros: Wide 100° FOV, strong light correction, included privacy cover, universal OS compatibility. Cons: Noise cancellation struggles in very loud environments, plastic build feels less premium.
Bottom Line: A top pick for budget 1080p needs, especially where room framing matters. Skip only if prioritizing studio-grade audio.
9. Anker PowerConf C200 2K Webcam for PC/Laptop/Mac, Computer Camera, Low-Light Correction, AI-Noise Canceling Mics, Adjustable Field of View, Built-in Privacy Cover, Stereo Mics, for Meeting
Overview: Anker’s PowerConf C200 merges 2K resolution with AI-powered audio and customizable framing for professional meetings. It targets remote workers needing adaptability in dynamic environments.
What Makes It Stand Out: Software-adjustable FOV (65°–95°) lets you reframe shots per meeting needs—a rarity in this tier. AI noise cancellation isolates voices effectively, while low-light correction ensures clarity without extra lighting. The privacy cover is integrated and smooth.
Value for Money: Mid-priced but punches above its weight with flexible FOV and strong low-light performance. Beats fixed-FOV competitors like Logitech Brio 100 for versatility, though Anker’s software ecosystem is less mature than Logitech’s.
Strengths and Weaknesses: Pros: Unique adjustable FOV, excellent noise suppression, reliable low-light handling, clean privacy mechanism. Cons: 2K output may strain bandwidth, software requires updates for full feature access.
Bottom Line: Highly recommended for adaptable, high-quality meetings. The FOV flexibility makes it a standout for evolving workspace needs.
10. Logitech Brio 100 Full HD 1080p Webcam for Meetings, Streaming, Desktop, Laptop, PC - Built-in Mic, Shutter, Works with Zoom, Microsoft Teams, Nintendo Switch 2’s New GameChat Mode-Off -White

Overview: Logitech’s Brio 100 is a streamlined 1080p webcam focused on simplicity for meetings and streaming, featuring RightLight tech and a physical privacy shutter. It’s a no-frills successor to the C270.
What Makes It Stand Out: RightLight boosts brightness by 50% over older models, reducing shadows effectively. The integrated privacy shutter and plug-and-play reliability align with Logitech’s trusted ecosystem. Switch 2 compatibility is touted but unconfirmed.
Value for Money: Priced slightly above entry-level, it offers solid 1080p quality and Logitech’s reliability. However, it lacks features like wide FOV or advanced noise cancellation, making it less compelling than the Gohero or Anker at similar prices.
Strengths and Weaknesses: Pros: Bright, consistent 1080p video, robust privacy shutter, seamless Zoom/Teams integration. Cons: Basic built-in mic, fixed 78° FOV, Switch 2 claims feel speculative.
Bottom Line: A dependable, straightforward option for casual users valuing Logitech’s brand, but skip if you need advanced audio or framing features.
Understanding Mac-Specific Webcam Integration Needs
Why Mac Compatibility Isn’t Always Guaranteed
While macOS is known for its stability, not all USB or USB-C peripherals are created equal. Webcams designed primarily for Windows ecosystems can sometimes encounter driver issues, inconsistent performance after macOS updates, or fail to appear in system preferences altogether. Apple Silicon Macs (M1, M2, M3 series and beyond) introduce another layer, as some older webcams relying on specific x86 architecture drivers simply won’t function. True Mac integration means the camera is recognized natively by macOS without requiring third-party software installations that can become outdated or buggy.
The Significance of Native macOS Optimization
Beyond basic recognition, truly optimized webcams leverage macOS features seamlessly. This includes proper integration with the Camera app for quick previews, smooth handoff when switching between video conferencing apps (Zoom, Teams, FaceTime), consistent color reproduction aligned with Apple’s display standards, and minimal CPU overhead. Optimized webcams often work flawlessly with macOS features like Center Stage (on supported models) or spatial audio if the mic is integrated, without causing system lag or crashes.
Navigating Apple Silicon Compatibility Challenges
Apple’s transition to its own M-series chips is a game-changer for performance and battery life, but it can trip up older hardware. Webcams requiring Rosetta translation for their drivers are a red flag; they might work initially but become unreliable. Prioritize webcams explicitly stating compatibility with Apple Silicon Macs or those using standard UVC (USB Video Class) protocols, which macOS supports natively without proprietary drivers. Checking recent user reviews specifically mentioning M1/M2/M3 Macs is crucial.
Essential Connection Types and Port Considerations
USB-C: The Modern Mac Standard
With most newer MacBooks and the Mac Studio/Mac Mini featuring primarily USB-C (Thunderbolt 3/4) ports, a USB-C webcam is often the most streamlined choice. It eliminates the need for dongles, supports higher bandwidth for 4K video (if the webcam offers it), and frequently provides sufficient power through the port itself. Ensure the webcam uses a standard USB-C connector, not one requiring a specific Thunderbolt port, for universal compatibility across Mac models.
USB-A: Still Relevant for Older Macs
If you’re using an iMac with legacy ports or an older MacBook Pro, USB-A (the traditional rectangular port) remains perfectly viable. Many reliable webcams still use this connection. The key consideration is ensuring the webcam adheres to the UVC standard for plug-and-play functionality on macOS. Avoid models that require specific USB-A drivers not bundled with macOS.
Wireless Options: Convenience vs. Reliability Trade-Off
Bluetooth or Wi-Fi webcams offer cable-free setups, appealing for clean desk aesthetics. However, they introduce potential pitfalls: latency (audio/video sync issues), intermittent dropouts, battery management hassles, and sometimes complex pairing processes that aren’t always Mac-friendly. For critical professional use, a wired connection (USB-C or USB-A) generally provides superior, more dependable performance essential for seamless integration.
Decoding Resolution and Image Quality Factors
1080p HD: The Practical Sweet Spot
While 4K sounds impressive, 1080p (Full HD) remains the gold standard for video conferencing on Macs. It delivers sharp, clear images that most platforms (Zoom, Teams, Google Meet) are optimized to handle efficiently. Higher resolutions like 4K often consume significantly more bandwidth and CPU resources for encoding/decoding, potentially causing lag or dropped frames on video calls, negating the visual benefit. 1080p strikes the ideal balance between quality and system performance for everyday Mac use.
Beyond Megapixels: Sensor Size and Low-Light Performance
A large sensor size (often measured in inches, like 1/2.8") is far more critical for good image quality than a high megapixel count alone, especially in typical home/office lighting. Larger sensors gather more light, resulting in clearer, less grainy images in dimmer environments – a common scenario for many Mac users. Pay attention to specifications mentioning low-light sensitivity or minimum illumination levels; this is often more telling than resolution numbers.
Frame Rate Consistency for Natural Movement
A solid 30 frames per second (fps) is standard and sufficient for most video calls. Some webcams boast 60fps, which can make motion appear smoother. However, the consistency of the frame rate is paramount. A webcam that reliably delivers 30fps without stuttering is vastly preferable to one that intermittently hits 60fps but drops frames frequently. Check reviews for mentions of smooth video during normal use on Mac systems.
The Built-in Webcam Dilemma: When to Upgrade
Limitations of Integrated MacBook/iMac Cameras
Apple’s built-in cameras, while convenient, often fall short for demanding use. Common limitations include a fixed, often unflattering upward angle (especially on laptops), smaller sensors leading to poor low-light performance, limited field of view, and basic noise reduction that can’t compete with dedicated hardware. If your work involves frequent video calls in varied lighting or requires a professional appearance, these constraints become significant drawbacks.
Scenarios Demanding an External Webcam
Consider upgrading if you experience consistently poor video quality in meetings, need a more flattering camera angle (e.g., eye-level on a monitor), work in rooms with challenging lighting, require a wider field of view for team meetings, desire features like physical privacy shutters, or use older Macs with subpar built-in cameras. An external webcam offers flexibility and a tangible upgrade in perceived professionalism.
Cost-Benefit Analysis of External Solutions
Weigh the investment against the value of improved communication. A mid-range external webcam ($50-$150) can dramatically enhance your video presence, potentially impacting job performance, client trust, or even career advancement. For occasional personal use, the built-in camera might suffice, but for professionals relying on video daily, the upgrade cost is often justified by the significant boost in quality and integration reliability.
Lighting: The Unsung Hero of Professional Video
Why Ambient Light Matters More Than Camera Specs
No webcam, regardless of price, can overcome terrible lighting. Harsh overhead lights create unflattering shadows, while sitting with a bright window behind you turns you into a silhouette. Proper lighting setup is arguably more important than the camera itself for achieving clear, professional-looking video on your Mac. It reduces the strain on the camera’s sensor and software, leading to cleaner images with less noise.
Budget-Friendly Lighting Solutions for Mac Users
You don’t need expensive studio lights. Positioning your desk near a north-facing window (providing soft, even daylight) is ideal. A simple, affordable LED ring light placed just above your monitor, slightly angled down, provides consistent, flattering illumination. Even a well-placed desk lamp with a daylight-balanced bulb can make a massive difference. Avoid placing lights directly behind you or letting your screen be the primary light source on your face.
Leveraging Mac Features for Better Exposure
macOS and video conferencing apps often include basic exposure and brightness controls within their camera settings. While not a substitute for good ambient light, learning to adjust these before your call can help compensate for minor lighting issues. Be cautious not to crank them up too high, as this can introduce digital noise and make the image look unnatural.
Audio Integration: Clarity is Non-Negotiable
The Pitfalls of Separate Microphones
Using a separate external microphone adds another cable, potential driver conflict, and setup step. While high-end mics offer superior sound, the convenience of integrated audio in a webcam (with a good quality mic) often wins for seamless Mac integration, especially for desk-bound use. Ensure the webcam’s microphone is positioned correctly (usually near the lens) and uses noise suppression.
Evaluating Built-in Webcam Microphone Quality
Test the mic! Record a short video using the Mac’s built-in Camera app with the webcam. Listen for clarity, background noise pickup (keyboard clicks, fan noise), and whether your voice sounds natural or tinny. Effective noise cancellation that suppresses keyboard taps and ambient room noise without making your voice sound muffled is a hallmark of a quality integrated mic solution for professional Mac use.
When a Dedicated Mic is Still Worthwhile
If you’re in a very noisy environment, do voice-over work, or require broadcast-level audio, a dedicated USB microphone (like those from Shure or Rode) might be necessary. However, prioritize models known for excellent macOS compatibility (UAC compliant) and plug-and-play operation to maintain the seamless experience you seek. The trade-off is an extra device to manage.
Software Ecosystem and App Compatibility
Seamless Operation Across Key Mac Apps
True integration means the webcam works flawlessly not just in Zoom, but also in Microsoft Teams, Google Meet, Slack huddles, FaceTime (as an external option), Webex, and even creative apps like OBS Studio for streaming. Test the webcam immediately upon plugging it in by opening several of your most-used video applications and verifying it appears as a camera option and functions correctly without needing app-specific settings adjustments.
Avoiding Driver Dependency Traps
Webcams requiring proprietary macOS drivers are a major red flag for long-term seamless integration. These drivers can break with macOS updates, become unsupported by the manufacturer, or conflict with other software. Prioritize webcams that function as standard UVC/UAC (USB Audio Class) devices. macOS recognizes these natively, ensuring compatibility across versions and eliminating the hassle of driver management.
Leveraging macOS System Preferences
A well-integrated webcam should be fully controllable within macOS System Settings > Camera. This should allow you to adjust basic settings like exposure, white balance, or zoom (if supported) without needing the manufacturer’s software. Consistent behavior here is a strong indicator of deep macOS compatibility and a smoother user experience.
Privacy and Security Imperatives
The Critical Need for a Physical Shutter
Software-based camera access indicators in macOS (the green light) are good, but a physical sliding shutter provides undeniable peace of mind. It offers a tangible, mechanical barrier against potential remote access exploits, something no software toggle can guarantee. For Mac users concerned about privacy (and everyone should be), this feature is non-negotiable for seamless and secure integration.
Understanding macOS Camera Permissions
macOS provides granular control over which apps can access your camera. A well-behaved webcam shouldn’t trigger unnecessary permission requests or cause apps to malfunction when permissions are toggled. Ensure the camera appears correctly in System Settings > Privacy & Security > Camera, and that you can reliably enable/disable access per application without system glitches.
Secure Firmware and Manufacturer Trust
Research the manufacturer’s reputation for security. Do they provide firmware updates? How quickly do they patch vulnerabilities? While less common for webcams than other devices, insecure firmware can be a vector. Stick with reputable brands known for prioritizing security updates, especially those with a proven track record of macOS compatibility and support.
Mounting Flexibility and Ergonomics
Finding the Ideal Eye-Level Position
The single biggest improvement you can make to your video presence is positioning the camera lens at or slightly above eye level. This creates a natural, confident angle, avoiding unflattering up-the-nose shots common with built-in laptop cameras. Assess the mounting options: sturdy clip for monitors, flexible gooseneck for precise positioning, or standard tripod thread for ultimate flexibility on arms or stands.
Compatibility with Your Specific Setup
Consider your workspace. Do you have a single monitor, dual setup, or an iMac? Will the webcam obstruct your view? Does it need to clamp securely without scratching expensive displays? Ensure the mount is robust enough for your screen thickness and won’t wobble during typing. A small, lightweight design is often preferable for clean desk aesthetics on Macs.
Cable Management for a Polished Look
A dangling webcam cable looks unprofessional and can snag. Look for models with reasonably long, braided cables and consider simple adhesive cable clips or sleeves to route the USB cable neatly behind your monitor and down to your Mac. Some premium webcams integrate cable management features directly into their base or mount.
Future-Proofing Your Investment
Considering Upcoming macOS Features
Apple frequently enhances video communication in macOS updates (e.g., improved noise cancellation, Portrait mode for video calls, better spatial audio). While hard to predict, choosing a webcam with solid UVC compliance and a reputable manufacturer increases the likelihood it will support future macOS camera-related features without requiring hardware replacement.
Longevity Through Build Quality
Seamless integration shouldn’t be short-lived. Invest in a webcam with a metal housing or high-quality plastics that feel durable. Avoid flimsy plastic clips or wobbly joints. A well-built webcam withstands daily use, repositioning, and potential travel, ensuring reliable performance for years, not just months, alongside your Mac.
Manufacturer Support and Update History
Check the manufacturer’s website. Do they list clear, recent macOS compatibility? Is there a history of firmware updates addressing macOS changes? Responsive customer support for Mac-specific issues is a strong indicator the product is designed for longevity within the Apple ecosystem, protecting your investment.
Budgeting Smartly for Seamless Performance
Defining Your Essential Requirements
Before setting a budget, honestly assess your needs. Is 1080p sufficient, or do you need 4K for specific creative work? Is integrated audio critical, or will you use a separate mic? How vital is a physical shutter? Prioritizing must-have features for seamless Mac integration prevents overspending on unnecessary specs or underspending on critical functionality.
The Value of Mid-Range Reliability
Extremely cheap webcams often cut corners on sensor quality, low-light performance, build materials, and crucially, macOS driver stability. The mid-range price bracket ($70-$150) typically offers the best balance for Mac users: proven UVC compatibility, solid 1080p performance, good low-light handling, physical shutters, and reputable brands committed to Mac support. This is often where “seamless integration” is most reliably found.
Avoiding the Premium Trap for Basic Needs
High-end webcams ($200+) offer features like advanced auto-framing, superior 4K sensors, or professional-grade mics, but these are overkill for standard video conferencing. For the vast majority of Mac users seeking seamless daily integration for work or personal calls, these premium features rarely justify the cost. Focus on core performance and compatibility within the mid-range.
Making the Final Decision with Confidence
Creating Your Personalized Compatibility Checklist
Before purchasing, distill your research into a simple checklist based on your Mac model and needs: “Must work plug-and-play on M2 MacBook Pro,” “Requires physical shutter,” “1080p @ 30fps minimum,” “Sturdy monitor clip,” “Good low-light reviews.” Use this to filter options and avoid being swayed by irrelevant specs.
The Importance of Verified Mac User Reviews
Go beyond star ratings. Search specifically for recent reviews mentioning your exact Mac model (e.g., “M1 Mac mini,” “2023 MacBook Pro 14-inch”). Look for comments on setup ease, performance after macOS updates, low-light results, and any quirks within Mac video apps. Real-world Mac user feedback is invaluable for predicting seamless integration.
Testing Immediately Upon Arrival
Don’t wait for an important meeting! Plug the new webcam in as soon as it arrives. Test it thoroughly across all your primary video conferencing apps using the Mac Camera app for a baseline. Check the physical shutter, microphone clarity, low-light performance by dimming lights, and ease of positioning. This immediate verification ensures it meets your seamless integration expectations before the return window closes.
Frequently Asked Questions
Can I use any USB webcam with my Mac?
Most modern USB webcams using the standard UVC (USB Video Class) protocol will work plug-and-play with macOS without needing extra drivers. Avoid webcams requiring specific manufacturer drivers, as these often cause compatibility issues, especially after macOS updates. Always check recent user reviews specifically mentioning your Mac model.
Do I need a special webcam for an Apple Silicon Mac (M1, M2, M3)?
You don’t necessarily need a “special” webcam, but prioritize models confirmed to work with Apple Silicon. Focus on webcams using standard UVC protocols, as they are natively supported. Avoid older models known to require x86-specific drivers that won’t function under Rosetta 2. Recent user reviews on Apple Silicon Macs are the best indicator.
Is 4K resolution necessary for video calls on a Mac?
Generally, no. 1080p (Full HD) is the practical standard for video conferencing. Most platforms optimize for 1080p, and higher resolutions like 4K consume more bandwidth and CPU power, potentially causing lag or dropped frames without a noticeable quality improvement on standard call windows. 1080p offers the best balance of quality and performance for seamless integration.
Why is low-light performance so important in a Mac webcam?
Many video calls happen in typical home or office lighting, which is often less than ideal. A webcam with a larger sensor and good low-light sensitivity produces clearer, less grainy images in these common scenarios, significantly improving your professional appearance without needing complex lighting setups. It reduces reliance on software noise reduction, which can make video look unnatural.
Are webcams with built-in microphones reliable for Mac video calls?
Many mid-range webcams offer surprisingly good integrated microphones with effective noise cancellation for desk use. They eliminate the hassle of a separate mic and potential driver conflicts. However, test the audio quality – ensure it captures your voice clearly while suppressing keyboard clicks and background noise. For very noisy environments or critical audio needs, a dedicated USB mic might still be preferable.
How crucial is a physical privacy shutter for a Mac webcam?
It’s highly recommended for security and peace of mind. While macOS shows a green light when the camera is active, a physical shutter provides a guaranteed mechanical barrier against potential remote access vulnerabilities. Privacy is paramount, and a shutter offers tangible security that software controls cannot match, making it a key feature for seamless and secure integration.
Will a USB-C webcam work with my older Mac that only has USB-A ports?
Yes, easily. You’ll just need a simple, inexpensive USB-C to USB-A adapter or cable. Ensure the webcam itself is UVC-compliant for plug-and-play functionality on macOS. The adapter doesn’t affect compatibility; it’s purely a physical connector change. Most reliable webcams function perfectly with this setup.
Can I use my iPhone as a high-quality webcam for my Mac?
Yes, Apple’s Continuity Camera feature (in macOS Ventura and later) allows certain iPhone models to function as a seamless, high-quality webcam for your Mac. It leverages the iPhone’s superior camera, offers Center Stage, and integrates natively without third-party apps. This is an excellent option if you have a compatible iPhone and Mac, providing exceptional quality and true ecosystem integration.
What’s the single biggest factor for a truly seamless Mac webcam experience?
Native macOS compatibility without requiring proprietary drivers is paramount. Webcams adhering strictly to the UVC/UAC standards are recognized instantly by macOS, work consistently across video apps, and remain functional through system updates. Avoiding driver dependency is the foundation of a hassle-free, truly seamless experience.
How can I test a new webcam’s compatibility before an important meeting?
As soon as you receive the webcam, plug it in and test it immediately using the built-in Mac Camera app. Then, open all your primary video conferencing applications (Zoom, Teams, etc.) and verify the camera appears as an option and functions correctly in each. Check the physical shutter, microphone, and performance in your typical lighting conditions well before your next critical call.
See Also
- 10 Best Webcams for Mac Streamers Seeking Seamless Integration in 2026
- 10 Best Webcams for Mac Users Wanting Studio-Quality Face Cams in 2026
- 2026’s Top 10 Webcams for PC for Seamless Integration with OBS and Streamlabs
- 10 Top-Rated Webcams for Mac According to Experts in 2026
- 10 Best Webcams for Mac for Streamers Using Final Cut and QuickTime in 2026