Table of Contents
That sinking feeling hits suddenly—your stomach drops, forehead beads with sweat, and the virtual world you were exploring becomes an enemy. Motion sickness has ended countless VR sessions before they truly began, leaving enthusiasts frustrated and newcomers convinced virtual reality isn’t for them. The truth is, this isn’t an inevitable price of admission. The right hardware design can dramatically reduce or even eliminate these symptoms, transforming your experience from nauseating to exhilarating.
Comfort-fit VR headsets have evolved from a luxury perk to an essential feature for anyone serious about avoiding virtual vertigo. This year, manufacturers have prioritized ergonomic engineering, advanced display technologies, and customizable fit systems specifically targeting motion sickness prevention. Understanding what makes a headset genuinely comfortable—beyond marketing claims—empowers you to make an informed decision that protects both your wallet and your wellbeing. Let’s explore the critical features, design principles, and buying strategies that separate nausea-inducing headsets from those that feel like natural extensions of your senses.
Top 10 Comfort Fit VR Headsets
Detailed Product Reviews
1. Head Strap for Oculus Meta Quest 3/3S with Battery, Adjustable VR Accessories with One-Click Fit, Rear Cushion Dial, 2–4H Playtime, VR Head Strap Reduce Facial Stress for Gaming Comfort
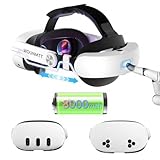
Overview: This premium head strap transforms the Meta Quest 3/3S into a marathon-ready VR system. Featuring an integrated rechargeable battery that extends playtime by 2-4 hours, it addresses the headset’s primary limitation while dramatically improving comfort. The patented one-click release mechanism and precision rear dial make adjustments effortless, eliminating the fumbling common with standard straps.
What Makes It Stand Out: The dual-patented design sets this apart. The one-click release system allows instant removal, while the three-level rear support with 15° adaptive tilt conforms to any head shape. The rear-mounted battery creates perfect balance, reducing facial pressure significantly. Fast 2.5-hour charging ensures minimal downtime between sessions.
Value for Money: While pricier than basic straps, the built-in battery alone justifies the cost compared to Meta’s official battery strap. You’re essentially getting a comfort upgrade and power bank in one, saving money over separate purchases. For serious VR enthusiasts, the uninterrupted gameplay is invaluable.
Strengths and Weaknesses: Pros include extended battery life, exceptional comfort, intuitive adjustment, and balanced weight distribution. Cons require a separate 45W adapter for optimal charging, adds some weight compared to non-battery straps, and carries a premium price tag.
Bottom Line: An essential upgrade for dedicated Quest 3/3S users who prioritize extended sessions. The battery integration and superior ergonomics make it worth every penny for immersive gaming marathons.
2. WOUNMTT Head Strap VR Headset Accessories for Oculus Meta Quest 3/3S Adjustable Enhanced Comfort VR Accessory with Balanced Support and Secure Fit for Long VR Sessions

Overview: The WOUNMTT head strap offers a refined comfort solution for Quest 3/3S owners seeking better ergonomics without battery bulk. This accessory focuses on quick adjustments and balanced weight distribution, making it ideal for multi-user households and extended play sessions where simplicity matters most.
What Makes It Stand Out: The one-button release mechanism enables lightning-fast tightening and loosening with one hand. Its three-position rear adjustment ensures personalized fit for various head shapes, while the reinforced cradle shifts weight away from the face. The durable yet lightweight construction withstands daily use without adding fatigue.
Value for Money: Positioned as a mid-range option, it delivers premium comfort features without the battery premium. Compared to official Elite straps, it offers similar adjustability at a more accessible price point. For users who don’t need extended battery life, this represents excellent value.
Strengths and Weaknesses: Strengths include rapid one-handed adjustment, excellent weight distribution, robust build quality, and universal fit. Weaknesses lack integrated battery for longer sessions, and the design may feel less premium than higher-priced alternatives. Some users might miss the convenience of hot-swappable power.
Bottom Line: A smart choice for VR users who value comfort and convenience over extended battery life. Its quick-adjust design and solid construction make it perfect for families or frequent session-switchers.
3. DESTEK V5 VR Headset for Phone w/VR Gamepad, 128 Premium VR apps Included, Anti-Blue Eyes Protected HD Lenses, 110° FOV Virtual Reality Headsets for iPhone, Android Phone - Black

Overview: The DESTEK V5 brings virtual reality to smartphones with a comprehensive package designed for accessibility. Unlike dedicated headsets, this phone-based solution includes 128 curated VR apps and a gamepad, making it an all-in-one entry point for families and casual users exploring VR without significant investment.
What Makes It Stand Out: Eight years of refinement shows in the 110° field of view and 92% light-transmission lenses. The anti-blue light protection addresses parental concerns about screen time. Exclusive touch buttons and the included gamepad enhance interaction beyond basic phone VR capabilities, while eco-friendly materials ensure comfortable wear.
Value for Money: At a fraction of standalone VR costs, this offers remarkable value. The included apps and controller eliminate additional purchases. However, performance depends entirely on your phone’s capabilities, making it a budget-friendly but limited alternative to true VR systems.
Strengths and Weaknesses: Pros include extensive app library, eye protection features, comfortable eco-friendly design, and included controller. Cons involve phone VR’s inherent limitations (tracking, graphics), compatibility constraints, and lack of true 6DOF experiences compared to dedicated headsets.
Bottom Line: Perfect for families and VR newcomers wanting to test the waters economically. While it can’t match dedicated headsets, the curated content and safety features make it an excellent starter package.
4. Saqico Head Strap for Meta Oculus Quest 3S/ Quest 3, Pressure-Free Elite Strap Accessories Replacement, Adjustable Headband Soft Cushion VR Headset Enhanced Comfort & Balanced Fit for Longer Immersion

Overview: Saqico’s head strap prioritizes pressure-free comfort for Quest 3S/3 users through thoughtful cushioning and family-friendly design. Weighing just 6.9 ounces, this lightweight accessory focuses on distributing weight evenly while offering versatility for both adults and children sharing the same headset.
What Makes It Stand Out: The 0.67-inch memory foam cushions on both rear and top straps provide exceptional pressure relief. Its detachable design reduces packaging size and environmental impact while offering three wearing configurations. The 360° rotatable knob allows even children to adjust fit independently, promoting autonomous use.
Value for Money: This mid-priced strap competes directly with premium non-battery options. The detachable feature adds travel convenience, while the dual-thickness cushioning matches more expensive competitors. For families, the universal adjustability eliminates needing multiple straps.
Strengths and Weaknesses: Advantages include superior memory foam comfort, lightweight portability, easy child-friendly adjustments, and versatile wearing options. Drawbacks include no battery integration, potentially less robust feel than premium alternatives, and the detachable design may require occasional reassembly.
Bottom Line: An excellent family-oriented upgrade that doesn’t compromise on comfort. The lightweight, adjustable design makes it ideal for households where multiple users share one Quest headset.
5. VR Headset for Phone with Controller, Anti-Blue Lens PD & Fl Adjustable Virtual Reality Goggles Set for Kids and Adults, Compatible with iPhone 16/15/14/13/12 Samsung Android 4.5-6.7"

Overview: This budget-friendly phone VR headset democratizes virtual reality with an adjustable design and included controller. Compatible with most smartphones between 4.5-6.7 inches, it targets casual users and families seeking an affordable entry point into VR experiences without investing in dedicated hardware.
What Makes It Stand Out: The included controller adds interaction depth rare in this price range. Adjustable pupil distance and focal length accommodate various vision needs, while anti-blue light lenses prioritize eye safety. The extensive compatibility list covers many iPhone and Samsung models, making it accessible to most smartphone owners.
Value for Money: Exceptionally affordable, this offers the full phone VR experience including controller. However, critical compatibility exclusions (no phones over 6.3 inches) limit its usefulness for owners of newer large-screen devices. For compatible phones, it’s unbeatable value.
Strengths and Weaknesses: Pros feature low price, included controller, wide compatibility (with caveats), and adjustable optics. Cons include incompatible with popular large phones (Pro Max models), phone VR’s limited tracking capabilities, and build quality that reflects the budget price point.
Bottom Line: A solid starter VR kit for users with compatible smartphones. Verify your phone’s dimensions first—if it fits, this delivers surprising value for casual VR exploration and entertainment.
6. Head Strap for Oculus Meta Quest 3S Quest 3, Fashion Adjustable Comfort Enhanced Support VR Headset Accessories Strap No Battery Reduce Facial Stress and Gaming Immersion

Overview: This third-party head strap targets Quest 3 and 3S users seeking enhanced comfort without adding battery weight. It replaces the standard strap with a multi-point adjustment system designed to distribute pressure more evenly across the skull, reducing facial strain during extended sessions.
What Makes It Stand Out: The three-tiered adjustment system is genuinely innovative: a one-click telescopic button for quick scalp fitting, rear three-level positioning for gross head circumference changes, and a precision rotating gear for fine-tuning. This granular control ensures both children and adults achieve a secure fit. The slow-rebound cotton cushioning creates a plush barrier that improves stability while maintaining breathability.
Value for Money: Priced competitively against official Elite straps, this accessory offers similar ergonomic benefits at a fraction of the cost. The absence of a battery keeps the price accessible while focusing purely on comfort improvements. For budget-conscious VR enthusiasts, it delivers premium adjustability without the premium tax.
Strengths and Weaknesses: Pros: Exceptional adjustability for all head sizes; breathable, pressure-relieving padding; quick-release mechanism simplifies removal; lightweight design avoids neck fatigue. Cons: Lacks integrated battery option for extended play; third-party build quality may vary; installation requires careful alignment; no official warranty support from Meta.
Bottom Line: An excellent comfort upgrade for Quest 3/3S owners prioritizing ergonomics over extended battery life. The sophisticated adjustment system and quality padding make it a smart purchase for families sharing headsets across different age groups.
7. TECKNET VR Headset for Phone, Virtual Reality Headsets with HD 110°FOV Anti-Blue Light Lenses & Adjustable Gears, 3D VR Headset for Kids Compatible iPhone Samsung Android 4.7-7.2" - Black

Overview: TECKNET’s phone-based VR headset brings immersive 3D experiences to smartphones without requiring dedicated VR hardware. Compatible with devices ranging from 4.7 to 7.2 inches, it serves as an accessible entry point for casual users and children exploring virtual reality through mobile apps, 360° videos, and basic VR content.
What Makes It Stand Out: The ultra-lightweight 268g frame significantly reduces neck strain compared to heavier alternatives. Its dual independent lenses feature anti-blue light coating and accommodate myopia up to 600° without requiring glasses. The 90-110° field of view delivers respectable immersion for smartphone-based VR, while the adjustable headband and soft nose rest ensure all-day comfort.
Value for Money: This represents one of the most affordable VR entry points available. While it can’t match dedicated headsets’ performance, it democratizes VR access for families and casual users. The inclusion of eye protection features adds value typically reserved for pricier models, making it an economical way to explore VR without commitment.
Strengths and Weaknesses: Pros: Extremely lightweight and comfortable; broad phone compatibility; genuine eye protection for extended use; accommodates significant myopia; budget-friendly price point. Cons: Limited by smartphone processing power; no positional tracking; experiences vary by phone quality; foam padding may wear quickly; not suitable for high-end gaming experiences.
Bottom Line: Perfect for VR-curious families and casual users. If you own a capable smartphone and want to explore 360° videos and simple apps without major investment, TECKNET delivers surprising quality. Serious gamers should invest in dedicated headsets instead.
8. KawayeReal Head Strap for Meta Quest 3/Quest 3S/Quest 2 with Soft Cushion Pad – Adjustable Comfortable VR Headset Strap with Enhanced Support, Lightweight Elite Strap Replacement, VR Accessories

Overview: KawayeReal’s universal head strap addresses comfort across Meta’s Quest ecosystem, supporting Quest 2, 3, and 3S with a single accessory. It functions as a direct Elite strap replacement, focusing on intelligent weight distribution and quick-access convenience through its innovative flip-up hinge design that simplifies transitions between virtual and real worlds.
What Makes It Stand Out: The 55-degree flip-up mechanism allows instant real-world access without full removal—ideal for glasses wearers, developers, and social VR participants. Its universal compatibility eliminates the need for multiple straps when upgrading headsets. The breathable, skin-friendly cushion pad wraps around the head, maximizing contact area for superior weight distribution and extended-session comfort.
Value for Money: Offering cross-generational compatibility, this strap provides exceptional long-term value for users who may upgrade between Quest models. It matches official Elite strap features while typically costing 30-40% less, making it an economical choice for multi-headset households seeking consistent comfort across devices.
Strengths and Weaknesses: Pros: Works seamlessly across Quest 2/3/3S; innovative flip-up design enhances practicality; lightweight yet durable construction; generous padding enhances comfort significantly; easy rear-knob adjustment for quick fitting. Cons: Flip hinge may loosen with heavy use; padding thickness could interfere with over-ear headphones; third-party quality control inconsistencies possible; lacks battery integration for longer play sessions.
Bottom Line: A versatile, future-proof comfort solution for Meta Quest users. The flip-up feature and universal fit make it particularly valuable for households with multiple headsets or users who frequently switch between virtual and real worlds. Strongly recommended for upgrade-minded VR enthusiasts.
9. Head Strap for Quest 3S/ Quest 3/Quest 2, Elite Strap Replacement Enhanced Support Comfort, VR Headset Accessories Compatible with Oculus Meta Quest 3 Headstrap Reduce Facial Stress- MV1000

Overview: The MV1000 positions itself as a universal Elite strap replacement for Meta’s Quest 2, 3, and 3S headsets. It emphasizes durability and stability through upgraded polymer side straps and a distinctive Y-shaped top support system designed to prevent headset shake and movement during active gameplay and fitness applications.
What Makes It Stand Out: Side straps tested to 10,000 bends ensure long-term reliability absent in cheaper alternatives. The Y-shaped top connector disperses weight more effectively than standard T-strap designs, reducing pressure points across the head. The 45-degree flip-up function balances convenience with stability better than steeper hinge angles, maintaining secure positioning while allowing quick real-world access.
Value for Money: Competitively priced against both official and premium third-party straps, the MV1000 justifies its cost through demonstrable durability testing and thoughtful engineering. The included installation tools and side panels add immediate value, making it a complete out-of-box solution that doesn’t require additional purchases.
Strengths and Weaknesses: Pros: Exceptional strap durability for long-term use; innovative Y-shaped weight distribution system; universal cross-model compatibility; skin-friendly top padding enhances comfort; convenient flip-up access for quick breaks. Cons: 45-degree flip may feel restrictive compared to 55-degree alternatives; polymer construction lacks premium feel of official straps; installation slightly more complex than simpler designs; no battery pack option for extended sessions.
Bottom Line: An excellent choice for active VR users who prioritize stability and longevity. The reinforced side straps and intelligent weight distribution system make it ideal for fitness gaming and energetic play sessions. A durable, well-engineered upgrade worth the investment for serious enthusiasts.
10. Kawaye Head Strap for Meta Quest 3S/3/2, Adjustable VR Headset Strap for Better Support&Comfort

Overview: Kawaye’s universal head strap emphasizes durability and thermal comfort across the Quest 2, 3, and 3S lineup. It specifically targets users frustrated with stock straps’ fragility and heat buildup, offering military-grade polymer construction and breathable slow-rebound padding in a streamlined, functional package designed for extended sessions.
What Makes It Stand Out: The 10,000+ bend-tested polymer frame addresses a common failure point in third-party straps, promising longevity that rivals premium options. The 55-degree flip hinge provides generous real-world access without compromising stability, while the wide support base actively prevents the slippage and sweat buildup that plague standard straps during intense gameplay.
Value for Money: This strap competes directly with budget Elite alternatives while offering superior durability claims. For users rough on equipment or sharing headsets among multiple family members, the reinforced construction translates to lower replacement costs over time, justifying a slightly higher initial price through extended lifespan and consistent performance.
Strengths and Weaknesses: Pros: Outstanding durability rating with bend testing; excellent heat management through breathable padding; universal Quest compatibility across three models; convenient flip-up design for quick access; secure dual-fastener system ensures stable mounting. Cons: ‘Military-grade’ claims lack specific certification detail; wide support base may feel bulky on smaller heads; minimal aesthetic customization options available; no integrated battery for extended wireless play.
Bottom Line: A robust, sweat-friendly upgrade for active VR users and families. If you’ve experienced broken straps or discomfort during intense sessions, Kawaye’s focus on durability and cooling makes this a practical, long-term investment that outperforms flimsier competitors and stock alternatives.
Understanding VR Motion Sickness: The Comfort Connection
The Science Behind VR-Induced Nausea
Motion sickness in virtual reality stems from a fundamental disconnect between what your eyes perceive and what your inner ear reports. Your vestibular system, located deep within your ears, detects physical movement and acceleration. When your visual field shows motion—flying, driving, or spinning—but your body remains stationary, your brain receives conflicting signals. This sensory mismatch triggers the same evolutionary response that causes seasickness: your nervous system assumes you’ve ingested a toxin and attempts to purge it. Modern comfort-fit headsets attack this problem at multiple angles, reducing the severity of this conflict through superior visual stability and physical comfort that minimizes subconscious strain.
Why Fit Matters More Than You Think
A poorly fitting headset doesn’t just feel uncomfortable—it actively contributes to motion sickness. When displays shift relative to your eyes due to loose straps or heavy front-loading, your visual reference points become unstable. Micro-movements of the screen create a subtle “swimming” effect that your brain struggles to process, exacerbating the vestibular disconnect. Pressure points on your forehead or cheeks cause discomfort that your nervous system interprets as additional stress signals, lowering your threshold for nausea. A truly comfortable headset disappears from your awareness, allowing your brain to focus on processing the virtual environment rather than managing physical discomfort.
The Vestibular Visual Mismatch Problem
The core issue remains the vestibular ocular reflex (VOR) disruption. Your VOR normally stabilizes your vision during head movements by moving your eyes in the opposite direction of your head motion. In VR, latency—the delay between your physical head movement and the corresponding visual update—breaks this reflex. High-quality comfort headsets prioritize low-latency tracking and high refresh rates to maintain VOR integrity. The physical fit directly impacts this: a stable, well-balanced headset ensures sensors move precisely with your head, while a wobbly fit introduces additional tracking errors that compound the latency problem.
Key Comfort Features That Minimize Motion Sickness
Weight Distribution and Balance
The ideal VR headset functions as a balanced weight across your entire head rather than a front-heavy display pulling your face forward. Premium designs incorporate rear-mounted battery packs or counterweight systems that shift the center of gravity backward, aligning it with the crown of your head. This balance reduces neck strain and prevents the constant downward pressure that causes facial discomfort and subconscious tension. Look for headsets that specify total weight distribution ratios—models approaching 50/50 front-to-back balance provide dramatically longer comfortable sessions. The materials matter too: magnesium alloys and advanced polymers shed grams without sacrificing structural integrity.
Strap System Design and Adjustability
The difference between a headache-inducing session and hours of comfortable play often comes down to strap engineering. Rigid halo-style systems that cradle the circumference of your head distribute pressure more evenly than simple elastic bands. These systems should offer multiple adjustment points: a top strap prevents downward slippage, while side dials provide micro-adjustments for different head shapes. The best designs allow you to achieve a secure fit without overtightening—think firm but gentle, like a well-fitted hat rather than a vice. Quick-release mechanisms also matter, letting you remove the headset instantly when discomfort begins, preventing symptoms from escalating.
Facial Interface Materials and Pressure Relief
The foam padding pressing against your face isn’t just about comfort—it’s crucial for motion sickness prevention. Memory foam with cooling gel infusion conforms to your facial structure without creating pressure points. Wider interfaces that spread contact across your forehead, cheeks, and nose bridge prevent the localized discomfort that amplifies nausea. Replaceable interfaces are essential; you can swap between different thicknesses for different users or activities. Some advanced designs incorporate air pockets or suspension systems that create a micro-gap for ventilation while maintaining light seal integrity.
IPD Adjustment Range and Precision
Interpupillary distance (IPD) matching—aligning the headset’s lenses with your actual eye spacing—is non-negotiable for preventing eye strain and motion sickness. Manual IPD sliders with clear numerical markings allow you to dial in your exact measurement, typically ranging from 58mm to 72mm to accommodate 95% of users. Stepless adjustment beats fixed increments, letting you find the sweet spot where images merge perfectly without ghosting. Some systems offer software IPD compensation, but physical adjustment remains superior for reducing the subtle visual distortions that trigger discomfort during rapid head movements.
Display Technologies for Visual Comfort
Refresh Rate Requirements for 2024
The refresh rate arms race has settled on 90Hz as the absolute minimum for comfortable VR, with 120Hz becoming the new standard and 144Hz reserved for premium models. Higher refresh rates directly reduce motion-to-photon latency, making head movements feel more naturally connected to visual updates. This smoothness prevents the “judder” effect that confuses your VOR. When evaluating headsets, prioritize models offering at least 120Hz in their native resolution—some advertise high refresh rates only at reduced resolutions, which defeats the purpose. The difference between 90Hz and 120Hz is immediately noticeable in fast-paced experiences and significantly extends comfortable session length.
Resolution and the Screen Door Effect
While higher resolution doesn’t directly prevent motion sickness, it reduces the screen door effect (visible grid lines between pixels) that forces your eyes to work harder to interpret the image. This visual fatigue lowers your overall nausea threshold. Modern headsets should offer at least 2160x2160 pixels per eye, with premium models pushing beyond 2400x2400. More importantly, examine the subpixel arrangement—RGB stripe layouts provide smoother image quality than diamond pentile arrangements at the same nominal resolution. This clarity means less subconscious squinting and strain, keeping your visual system relaxed and less prone to vestibular conflict.
Field of View Considerations
Wider field of view (FOV) increases immersion but can paradoxically worsen motion sickness if not implemented correctly. The sweet spot lies between 100-110 degrees for most users—wide enough to feel natural but narrow enough to maintain edge clarity and reduce the “swimming” distortion at peripheries. Some headsets offer variable FOV settings, letting you start narrower and gradually expand as you build VR legs. The shape matters too: horizontally wide but vertically constrained FOVs often feel more comfortable than perfectly circular views. Pay attention to how consistently the headset maintains focus across the entire field—soft edges reduce the abrupt visual cuts that can trigger discomfort.
Lens Technology Advancements
Traditional Fresnel lenses create concentric rings that catch light and cause god rays, especially in high-contrast scenes. These visual artifacts force your eyes to constantly adjust, contributing to fatigue. Newer pancake lenses use polarized light folding to create dramatically thinner, lighter optics with virtually no ghosting. The result is a clearer image across the entire field and a 40% reduction in headset front weight. Aspheric lenses offer a middle ground—heavier than pancake but optically superior to Fresnel. When choosing, remember that lens quality directly impacts how naturally your eyes can relax into the virtual space, a critical factor in long-term comfort.
Ergonomic Design Principles
Center of Gravity Optimization
The most overlooked comfort specification is center of gravity (COG) distance from your face. Premium headsets position the COG within 2-3 inches of your eyes, while poorly balanced models extend 4+ inches forward. This measurement determines how much torque the headset exerts on your neck. You can test this yourself: when holding a headset, find the balance point on a finger—closer to the display is better. Manufacturers achieving optimal COG use dense batteries at the rear, lightweight displays at the front, and chassis materials that position heavy components as far back as possible. This engineering directly reduces the neck tension that radiates upward and amplifies headache and nausea symptoms.
Pressure Point Elimination
Strategic padding placement prevents the common pain points that cut VR sessions short. The forehead pad should be wide and positioned high enough to avoid the sensitive brow ridge. Cheek pads must be soft enough to prevent the “goggle marks” that indicate excessive pressure. The rear pad should cradle the occipital bone at the back of your skull, not press against the muscles at the base of your neck. Advanced designs use pressure-mapping technology during development, identifying and eliminating hotspots. Look for headsets with multiple, independently adjustable pads or suspension systems that float the display slightly off your face, using a rigid frame to bear the weight.
Ventilation and Heat Management
Facial heat buildup doesn’t just cause sweating—it creates a microclimate of discomfort that your brain processes as additional stress. Active cooling systems with micro-fans exhaust warm air without creating noise that breaks immersion. Passive solutions include chimney-style vents that channel convection currents upward and away from your face. Some designs incorporate breathable fabrics in the facial interface, allowing air exchange while blocking light. The temperature difference between the headset interior and your face should be minimal—more than a few degrees Fahrenheit indicates poor thermal design. Overheating causes subconscious tension and accelerates fatigue, both notorious motion sickness multipliers.
Materials That Reduce Skin Irritation
Prolonged contact with synthetic materials can cause contact dermatitis, creating itchy, distracting discomfort. Medical-grade silicone facial interfaces resist bacteria while feeling cool against skin. Hypoallergenic foam alternatives like TPU (thermoplastic polyurethane) provide memory foam’s conforming properties without the chemical off-gassing. For extended sessions, removable, washable covers are essential—sweat and oil buildup not only feels gross but also degrades padding performance over time. The head strap material matters too; breathable mesh prevents the sweaty, sticky feeling that makes you constantly adjust the fit, introducing those micro-movements that worsen tracking stability.
Adjustment Mechanisms and Customization
Dial-Based Precision Fit Systems
Tool-less adjustment dials represent the gold standard for achieving consistent, repeatable comfort. A single rear dial that tightens a halo mechanism evenly around your head beats multiple Velcro straps that stretch and lose tension. The best systems provide audible clicks for precise adjustments—five clicks for your ideal fit, and you can return to that exact setting every time. This repeatability is crucial because even slight variations in fit change the display alignment and pressure distribution. Some premium headsets offer separate dials for vertical tilt and horizontal tightness, letting you fine-tune the display angle relative to your eyes, optimizing the sweet spot and reducing the need for constant micro-adjustments during use.
Counterweight Solutions
Even well-balanced headsets can benefit from customizable counterweight systems. These typically attach to the rear strap and use dense metal plates or battery packs to shift weight distribution. The key is modularity—being able to add or remove weight in small increments until you find your personal balance point. A properly counterweighted headset should feel like it’s floating, requiring minimal strap tension to stay stable. This reduces the “clamp force” that causes headaches and allows you to wear the headset looser, improving ventilation and reducing facial pressure. Some systems integrate batteries as counterweights, extending playtime while improving comfort—a rare win-win in VR design.
Facial Interface Swapping Options
One size never fits all faces, which is why tool-less interface swapping is a critical comfort feature. Different thickness interfaces accommodate various face shapes—deeper interfaces for prominent noses, shallower ones for flatter facial profiles. Some systems offer “comfort” interfaces with wider foam distribution and “performance” interfaces with minimal padding for active gaming. The ability to quickly swap these between users makes the headset more versatile and ensures each person gets an optimal fit. Look for magnetic attachment systems that snap into place securely without requiring you to wrestle with clips or screws—a process that becomes frustrating when you’re eager to start playing.
Prescription Lens Integration
Wearing glasses inside a VR headset creates pressure points, scratches lenses, and reduces the effective field of view. Built-in diopter adjustment, found on some premium models, lets nearsighted users dial in correction up to -6 or -8 without glasses. For more complex prescriptions, headsets should support third-party lens inserts that snap magnetically into place. These inserts should be easily removable for sharing the headset with non-glasses users. The best systems maintain the same eye relief distance with inserts installed, preserving field of view and comfort. This integration eliminates the constant awareness of frames pressing against your temples—a distraction that heightens overall discomfort and motion sickness susceptibility.
Advanced Comfort Technologies
Pancake Lens Advantages
Pancake optics represent the biggest leap in VR comfort in years. By folding the light path using polarization, these lenses achieve the same focal length in half the physical space, allowing displays to sit much closer to your face. This reduces the front-to-back size of the headset by 30-40%, moving weight inward and improving balance. The optical quality is superior too—no god rays, minimal chromatic aberration, and edge-to-edge clarity. Your eyes relax naturally instead of fighting distortions, reducing visual fatigue that compounds motion sickness. The trade-off is slightly lower light transmission, requiring brighter displays, but the comfort benefits far outweigh this minor drawback for most users.
Foveated Rendering Benefits
While primarily a performance technology, foveated rendering significantly impacts comfort. By rendering the center of your vision at full resolution and gradually reducing quality toward the periphery, it frees up processing power for higher refresh rates and lower latency. The effect is invisible to your eyes but dramatically improves motion-to-photon speed. Some advanced systems use eye-tracking to make this dynamic, following your gaze in real-time. This reduces the GPU workload by up to 40%, allowing developers to hit those critical 120Hz targets that keep your VOR happy. The result is smoother motion that feels more connected to your physical movements.
Asynchronous Spacewarp Features
Asynchronous Spacewarp (ASW) and similar frame-generation technologies create intermediate frames when the system can’t maintain native refresh rates. While this prevents stuttering that triggers motion sickness, poorly implemented ASW can introduce its own artifacts—ghosting and warping that feel unnatural. The key is how seamlessly the system transitions between native rendering and ASW. Premium headsets maintain consistent timewarp performance, making the switch invisible. This technology acts as a safety net, ensuring that even during performance dips, your visual motion remains smooth. For comfort-focused buyers, verify that ASW works reliably at your target refresh rate, not just as an emergency fallback.
Active Cooling Systems
Thermal throttling doesn’t just reduce performance—it creates unpredictable frame time variations that feel like micro-stutters, a motion sickness nightmare. Active cooling with silent micro-fans maintains consistent clock speeds, preventing these jarring variations. The fans exhaust hot air away from your face, typically upward through vents in the top of the headset. The best systems operate below 30 decibels—quieter than a whisper—so they don’t break immersion. Some even tie fan speed to processor temperature, ramping up gradually rather than cycling on/off abruptly. This consistent thermal management ensures your VR experience stays smooth and comfortable, even during marathon sessions.
Audio Solutions and Sensory Harmony
Off-Ear vs On-Ear Audio
On-ear headphones create pressure points and trap heat around your ears, adding discomfort that amplifies overall nausea susceptibility. Off-ear speakers, positioned slightly away from your ears, deliver spatial audio without physical contact. This “audio transparency” lets you hear your real environment, reducing the sensory isolation that can make motion sickness feel more intense. The best implementations use directional audio that focuses sound into your ears while leaking minimal noise to bystanders. For private listening, premium headsets offer magnetic on-ear attachments that snap over the off-ear speakers when needed, giving you flexibility without compromising the default comfort configuration.
3D Spatial Audio Impact
Accurate spatial audio actually reduces motion sickness by providing additional sensory cues that help your brain interpret motion. When you turn your head and the audio source stays locked to the virtual position, it reinforces the illusion of a stable world, reducing vestibular confusion. High-quality implementations use head-related transfer functions (HRTFs) personalized to your ear shape, creating pinpoint audio placement. This auditory grounding effect is especially powerful in vehicles or elevators within VR—hearing the engine rumble or machinery whir gives your brain non-visual confirmation of motion, paradoxically making it easier to accept the visual movement without nausea.
Reducing Sensory Conflict
Audio latency is as critical as visual latency. When sound lags behind motion, it creates another layer of sensory mismatch. Premium headsets use dedicated audio processing chips to ensure sub-20ms audio latency, keeping sound perfectly synchronized with visuals. Some advanced systems even adjust audio reverb and occlusion based on your virtual environment’s acoustics, further reinforcing spatial presence. This attention to audio detail reduces the cognitive load your brain spends reconciling senses, leaving more processing power to manage the vestibular-visual relationship. The result is a more coherent sensory experience that’s inherently easier on your nausea threshold.
Microphone Positioning Effects
Built-in microphones might seem unrelated to comfort, but poorly positioned mics force you to speak louder or strain your neck to be heard, creating tension that radiates throughout your upper body. Boom microphones that position the mic element close to your mouth allow natural speaking volumes, keeping your posture relaxed. Noise-canceling mics filter out ambient sound without requiring you to project, while pop filters prevent the sharp “p” sounds that can startle you during intense moments. This vocal comfort translates to physical comfort—staying relaxed and conversational in social VR reduces the overall stress that makes motion sickness more likely.
Cable Management and Wireless Freedom
Overhead Pulley Systems
For tethered headsets, ceiling-mounted pulley systems transform the experience from tripping hazard to near-wireless freedom. These systems use retractable dog-leash mechanisms that provide just enough tension to keep the cable elevated without pulling on the headset. The key is smooth retraction—jerky movements introduce forces that destabilize the headset, creating micro-movements that worsen tracking. Look for systems with multiple pulleys that distribute the cable weight across a wider area of your ceiling. When properly installed, you should forget the cable exists, allowing natural movement that reduces the cognitive dissonance between your physical constraints and virtual freedom.
Wireless Adapter Considerations
Wireless adapters free you completely, but they add weight and heat to the headset. The best implementations integrate the radio module into the rear counterweight, maintaining balance while adding minimal bulk. Battery life becomes crucial—aim for adapters offering at least 2-3 hours of continuous play, with hot-swappable batteries for longer sessions. Compression algorithms matter too; excessive compression introduces artifacts that can trigger discomfort. Premium wireless solutions use proprietary low-latency protocols that maintain visual quality while keeping motion-to-photon latency under 20ms. For comfort-sensitive users, the freedom of movement often outweighs the slight weight increase, provided the adapter is well-integrated.
Battery Pack Placement Strategies
For wireless headsets with rear-mounted batteries, placement affects both balance and heat. Batteries should sit low on the rear strap, aligning with the base of your skull rather than riding high. This positioning leverages your neck’s natural support structure and keeps heat away from your head’s primary blood flow. Removable batteries are essential—being able to swap without removing the entire headset means you can maintain your fit settings session after session. Some users add supplementary battery packs as counterweights, but this requires careful balance calculations. The total rear weight shouldn’t exceed the front weight by more than 20%, or the headset becomes back-heavy and unstable during rapid head movements.
Movement Freedom Impact
The psychological comfort of unrestricted movement cannot be overstated. When you’re constantly aware of cable length or wireless battery life, you move tentatively, which feels unnatural and increases motion sickness. True freedom lets you turn, duck, and lean without conscious planning, making your physical movements match your virtual intentions. This alignment between intention and action is perhaps the most powerful anti-motion-sickness factor. Your brain expects certain sensations when you initiate movement; delivering those expectations through unencumbered motion creates a harmonious experience that your vestibular system accepts rather than rejects.
Budget Considerations and Comfort Tiers
Entry-Level Comfort Expectations
Budget headsets under $400 can still provide comfortable experiences if you prioritize the right features. Focus on weight—aim for models under 500 grams. Manual IPD adjustment is non-negotiable, even at this tier. Accept fabric straps instead of rigid halos, but ensure they have proper top strap support. Skip advanced features like eye-tracking or pancake lenses, but don’t compromise on refresh rate—90Hz minimum is essential. Many entry-level models offer surprisingly good comfort by using simple, proven designs rather than cramming in features. The key is honest assessment: if a budget headset lacks IPD adjustment or feels front-heavy, it’s a motion sickness trap regardless of its low price.
Mid-Range Sweet Spot Features
The $400-$800 range hits the comfort sweet spot, offering most premium features without diminishing returns. Expect 120Hz refresh rates, rigid halo straps with dial adjustment, and quality foam interfaces. This tier often includes pancake lenses and wireless capabilities as standard. The best value comes from headsets offering modular upgrades—start with the base model and add counterweights or premium audio later. IPD ranges should be wide and precisely adjustable. Weight typically falls between 400-500 grams with good balance. For most users, this range eliminates 90% of motion sickness issues while leaving budget for accessories like prescription lens inserts or replacement facial interfaces.
Premium Comfort Innovations
Above $800, headsets compete on marginal gains that matter for sensitive users or professionals. We’re talking sub-20ms wireless latency, active cooling, eye-tracking with foveated rendering, and exotic materials like carbon fiber chassis. These headsets achieve weights under 350 grams while maintaining rigidity. The comfort improvements are real but incremental—a 10% reduction in weight or 5ms lower latency. For those highly susceptible to motion sickness or using VR for hours daily, these gains justify the cost. The premium tier also includes better software integration, with comfort-focused features like automatic IPD measurement and personalized fit guides that use passthrough cameras.
Value Analysis Approach
Calculate cost-per-comfort-hour rather than sticker price. A $300 headset that causes discomfort after 30 minutes costs $10 per comfortable hour, while a $600 headset providing 3-hour sessions costs $3.33 per hour. Factor in accessory costs—prescription inserts, counterweights, and replacement padding add $50-150 to any headset. Consider resale value; premium headsets retain 60-70% of their value after a year, while budget models drop to 30%. For motion sickness sufferers, the ability to return a headset that doesn’t work for you is priceless—factor restocking fees into your budget. Some retailers offer extended VR trial periods specifically for comfort testing, a service worth seeking out.
Breaking In and Adaptation Strategies
The Gradual Exposure Method
Even the most comfortable headset requires acclimation. Start with 10-15 minute sessions of stationary experiences, focusing on content where you control the pace. Gradually increase duration by 5 minutes every few days as long as you remain symptom-free. Between sessions, practice vestibular exercises—slow head movements while focusing on a fixed point—to train your VOR. Keep a comfort journal noting which experiences trigger symptoms and which feel fine. This data helps you identify patterns and avoid problematic content early on. The goal is building “VR legs” while your brain learns that the sensory mismatch is safe and predictable.
Session Length Best Practices
The 30-minute rule is gospel for motion sickness prevention. Set a timer and remove the headset when it dings, regardless of how good you feel. Symptoms often lag behind exposure—feeling fine at 35 minutes doesn’t mean you won’t be nauseated an hour later. Take 15-20 minute breaks between sessions, focusing on real-world visual references and walking around to recalibrate your vestibular system. Stay hydrated; dehydration lowers your nausea threshold significantly. Avoid VR on an empty stomach or immediately after heavy meals—both extremes worsen symptoms. Many users find ginger supplements taken 30 minutes before sessions provide natural anti-nausea benefits without drowsiness.
Comfort Training Schedules
Structured training programs accelerate adaptation faster than random usage. Week one: three 15-minute sessions daily of static content. Week two: two 20-minute sessions with slow artificial locomotion, like teleportation-only movement. Week three: one 30-minute session with smooth locomotion at reduced speed. Week four: attempt a 45-minute free-movement session. If symptoms appear, drop back to the previous week’s level for two more days before advancing. This progressive overload mirrors physical training, systematically desensitizing your vestibular system. The key is consistency—daily short sessions beat occasional marathons for building tolerance.
Recognizing Your Limits
Learn the early warning signs: subtle headache, slight disorientation, or feeling too warm. These precede full nausea by 5-10 minutes. When you notice them, stop immediately—pushing through guarantees misery. Everyone has different triggers; some can’t handle smooth turning but are fine with snap turning. Others tolerate cockpit games but not first-person exploration. Respect your unique physiology rather than forcing adaptation to everything. Some users never fully adapt to certain movement types, and that’s okay—there’s plenty of amazing teleportation-based and stationary VR content. The goal is enjoyable experiences, not suffering through unsuitable ones to prove something.
Maintenance and Longevity
Cleaning Protocols for Hygiene
Sweat and oil buildup degrades foam padding, making it stiffer and less comfortable over time. Clean facial interfaces after every intense session using alcohol-free antibacterial wipes—alcohol dries out foam and reduces lifespan. For deep cleaning, remove interfaces and wash with mild soap and cool water, air-drying completely before reattachment. Some premium interfaces are machine washable; check manufacturer guidelines. Head straps absorb scalp oils and need monthly cleaning—hand wash with gentle detergent. Never submerge electronic components. Regular cleaning prevents skin irritation and maintains the padding’s original softness, ensuring consistent comfort session after session.
Strap Tension Maintenance
Elastic straps stretch permanently over time, requiring increasingly tighter adjustments that create pressure points. Rigid halo systems with mechanical dials maintain tension better but need periodic checks for slippage. Test strap integrity monthly: set your usual adjustment and gently tug—if it loosens more than 10%, consider replacement. For Velcro systems, the hooks wear out faster than the loops; replace straps when they no longer “catch” firmly. Store headsets with straps fully loosened to reduce constant tension. Some premium headsets offer tension calibration in software, alerting you when straps need replacement before comfort degrades noticeably.
When to Replace Components
Facial interfaces typically last 6-12 months with regular use before foam compression becomes permanent. If you notice increased pressure on your cheekbones or forehead, the foam has likely lost its rebound. Replacement interfaces cost $20-40 and instantly restore comfort. Straps last 1-2 years depending on material quality. Signs of failure include cracking at adjustment points or loss of elasticity in fabric sections. Counterweight systems rarely need replacement but check attachment points for stress fractures. For wireless adapters, battery capacity degrades after 300-500 charge cycles; reduced playtime indicates it’s time for a new battery pack.
Proper Storage Techniques
Store headsets in a cool, dry place away from direct sunlight—UV degrades foam and plastics. Use a stand that supports the head strap without stretching it, never resting the headset on its lenses. Cover the facial interface with a breathable cloth to prevent dust accumulation while allowing moisture to evaporate. For long-term storage, remove batteries to prevent leakage. Keep the lens cover on to protect optics from scratches that would force your eyes to work harder to interpret blurry images. Proper storage extends component life by 50% and ensures the headset feels fresh each time you use it, maintaining the consistent fit that prevents motion sickness.
Making Your Final Decision
Assessing Your Sensitivity Level
Be brutally honest about your motion sickness history. If you can’t read in a car, you’re likely highly sensitive and should prioritize premium comfort features. If only extreme VR experiences bother you, mid-range options suffice. Test your baseline with a friend’s headset or in-store demo, noting exactly which symptoms appear and after how long. Consider your intended use—cockpit simulations are gentler than first-person shooters. Factor in session goals; 30-minute exercise sessions demand less comfort than 3-hour gaming marathons. This self-assessment prevents overspending on unnecessary features or underspending and ending up with a nausea-inducing paperweight.
Try-Before-You-Buy Opportunities
Never purchase a VR headset without a trial period. Major retailers offer 30-day returns, but check for restocking fees—some charge 15% for opened VR hardware. Specialty VR stores provide extended in-store demos where you can test actual content, not just tech demos. VR arcades often use commercial-grade headsets, giving you a sense of premium comfort benchmarks. Community meetups let you try enthusiast-owned headsets with honest feedback about long-term comfort. When testing, bring your own content on a USB drive—familiar experiences make it easier to isolate headset comfort from content variables. Spend at least 20 minutes in any trial headset before making judgment.
Return Policy Importance
A generous return policy is worth paying extra for. Look for 30-day windows with free return shipping and no restocking fees. Some manufacturers offer 60-day comfort guarantees specifically for motion sickness concerns. Read the fine print—policies often exclude “hygiene products” like facial interfaces, meaning you can’t return a headset if you’ve used the included foam. In these cases, purchase a separate interface for testing, preserving the original for potential return. Keep all packaging and documentation; missing accessories can trigger partial refund deductions. Consider purchasing with a credit card that offers extended return protection, adding another layer of safety to your investment.
Community Feedback Value
Reddit communities, Discord servers, and specialized VR forums provide unfiltered comfort feedback from long-term users. Search for “comfort” and “motion sickness” threads specific to headsets you’re considering. Look for patterns rather than individual complaints—one person reporting issues might be an outlier, but ten similar reports indicate a real problem. Pay attention to users with similar sensitivity profiles; their experiences predict yours. Developer forums often discuss hardware quirks that mainstream reviews miss. YouTube channels dedicated to VR comfort testing provide visual demonstrations of fit and adjustment techniques. This crowdsourced wisdom reveals comfort issues that only appear after weeks of use, not in launch-day reviews.
Frequently Asked Questions
How long does it typically take to adapt to VR and reduce motion sickness?
Most users see significant improvement within 1-2 weeks of consistent, gradual exposure. Start with 15-minute daily sessions and increase by 5 minutes every few days. However, individual variation is substantial—some adapt in days, others take months, and a small percentage never fully adapt to certain movement types. The key is consistent, symptom-free practice rather than pushing through nausea.
Can a better headset completely eliminate motion sickness, or will I always have some sensitivity?
A properly fitted, high-quality headset can eliminate motion sickness for 80-90% of users, especially when combined with gradual adaptation. The remaining 10-20% may always have some sensitivity to specific triggers like smooth artificial locomotion or spinny gameplay. Even for these users, comfort-fit headsets dramatically reduce symptom severity and extend comfortable session lengths.
Is wireless VR more comfortable for motion sickness, or does the added weight make it worse?
Wireless VR reduces motion sickness for most users despite slight weight increases. The freedom of movement eliminates the subconscious tension from cable awareness and allows natural, unrestricted motion that aligns better with visual feedback. The key is proper counterweight distribution—wireless adapters that integrate weight into the rear strap often improve overall balance, offsetting the front-loaded display weight.
How important is IPD adjustment really? Can’t software compensation fix misalignment?
Physical IPD adjustment is critical and cannot be fully replicated in software. Misaligned lenses cause eye strain, double vision, and subtle distortions that worsen motion sickness. Software compensation merely adjusts the rendered image but doesn’t fix the optical misalignment of lenses relative to your pupils. Always choose headsets with manual IPD adjustment covering your measured distance (typically 58-72mm).
Do prescription lens inserts affect comfort or motion sickness?
Properly fitted prescription inserts improve comfort by eliminating glasses pressure points and maintaining correct eye relief distance. They don’t directly impact motion sickness but reduce overall facial tension and eye strain, which indirectly lowers nausea susceptibility. Ensure inserts are precisely aligned and don’t reduce field of view—quality inserts should be invisible during use.
What’s the maximum comfortable weight for a VR headset?
For most users, the comfort threshold is around 500 grams total weight with proper balance. Above 600 grams, neck strain becomes noticeable within 30 minutes regardless of strap design. Premium headsets under 400 grams can be worn for hours. However, weight distribution matters more than absolute weight—a well-balanced 550-gram headset feels lighter than a poorly balanced 450-gram one.
Are there specific VR experiences I should avoid when starting out to prevent motion sickness?
Avoid smooth artificial locomotion (sliding movement with thumbsticks), roller coaster simulations, and spinning environments initially. Start with teleportation-based movement, stationary experiences, and cockpit games where you’re seated with a visible frame of reference. Gradually introduce more intense experiences as you build tolerance, always stopping at the first sign of discomfort.
How often should I replace facial interface padding for optimal comfort?
Replace foam interfaces every 6-12 months with regular use, or sooner if you notice permanent compression or reduced rebound. Silicone interfaces last 1-2 years. Signs you need replacement include increased pressure points, visible wear, or difficulty cleaning. Replacement restores original comfort and hygiene, directly impacting motion sickness prevention.
Can ambient room temperature affect VR motion sickness?
Yes, heat significantly worsens motion sickness. VR headsets raise facial temperature by 5-10°F, and if your room is already warm, this accelerates discomfort and fatigue. Ideal VR room temperature is 68-72°F with good air circulation. Active cooling headsets help, but a cool environment provides the best foundation for long, comfortable sessions.
Is it worth spending extra on premium straps and accessories, or do they just mask poor headset design?
Quality accessories can transform an adequate headset into a comfortable one, but they can’t fix fundamental design flaws like excessive weight or poor IPD range. For headsets with solid foundations, premium straps, counterweights, and replacement interfaces are worthwhile investments that personalize fit. However, if the base headset lacks manual IPD or weighs over 600 grams, accessories are just band-aids on a broken design.
See Also
- How to Solve VR Motion Sickness with the 10 Best Comfort Fit VR Headsets in 2026
- Stop Neck Pain with the 10 Best Comfort Fit VR Headsets This Year
- Stop Discomfort with the 10 Best Comfort Fit VR Headsets This Year
- Stop Wasting Time with Poor Tracking: 10 Best Motion Tracking VR Headsets This Year
- 10 Best VR Headsets for Motion Sickness Sufferers in 2026